 Thinking ahead when you pack can mean the difference between a calm first night in your new place and opening a box of shattered dishes. Beyond convenience, sound packing habits protect your health—nearly 8.5 percent of Americans seek emergency care each year for consumer-product injuries, many triggered by hurried lifting or toppled household goods. A well-packed home isn’t just tidy; it’s a testament to thoughtful planning, saving you time, stress, and even money in the long run.
At Red Barn Movers, we understand that every item in your home holds a place, whether it’s a treasured family heirloom or the kettle for your morning coffee. The practices below reflect how professional crews see successful homeowners prepare. We’re not just about transporting your belongings; we’re about helping you start fresh with confidence.
Tip 1: Establish One Packing Zone—and a Real Deadline
Packing accelerates when supplies and finished cartons live in one place. A single “staging” zone—a cleared dining table, a garage corner, or a spare room—keeps materials together and progress visible. Stock that zone with flat‑packed boxes, packing paper, bubble cushioning, a tape gun, permanent markers, and a utility knife. Post a simple checklist in the same spot and set a firm completion date several days before the truck arrives. A real deadline anchors daily targets and prevents last‑minute, injury‑prone sprints.
From that zone, adopt an assembly‑line rhythm: assemble a few boxes, pack them fully, seal them, and line them in a tidy row along a wall. Finished cartons should leave the zone only when truly complete; half‑filled boxes drifting through the house create clutter and trip hazards. One controlled hub imposes order on the entire residence and makes it easy to measure progress at a glance.
Tip 2: Keep Boxes Manageable
The safest rule for load size is practical rather than numerical: pack by feel and function, not by scales or written weights. Dense items—books, canned goods, tools, free weights—belong in small boxes that are comfortable to hand‑carry. Light, bulky items—pillows, bedding, plastic kitchenware—can fill larger cartons without becoming unwieldy. If a test lift feels awkward or strains the back, split the contents into two boxes.
Strong seams support safe carries. Reinforce the bottom lengthwise and then crosswise; keep top flaps folded flat as items go in, and close without bulging. Standard moving cartons are typically carried by hand inside homes to maintain control on stairs and tight bends; keeping each box compact and balanced helps crews avoid clipped corners, scuffed baseboards, and fatigue during long carry lines.
Tip 3: Cushion From the Bottom Up
Most breakage happens inside a box, not in the truck. Begin every fragile carton with a soft “mattress” of crumpled paper or bubble cushioning across the bottom. Wrap fragile pieces individually and eliminate empty space so nothing can rattle. Plates should be stacked flat with padding between each piece; if a stack grows tall, split it into two shorter stacks with cushioning between. Bowls can nest with paper separating each bowl; glasses and stemware should be wrapped and placed upright, ideally with dividers.
Liquids deserve special care. Seal bottles in zipper bags before boxing so a leak cannot migrate into neighboring cartons. After taping a box shut, a gentle shake should produce silence; any internal movement means more cushioning is needed. Bottom‑up cushioning, flat‑stacked plates, and filled voids together produce the quiet, well‑packed cartons that arrive intact and unpack quickly.
Tip 4: Label Two Sides and the Top
A clear label prevents repeat handling and guesswork. The standard that works best is simple: write the destination room (“Kitchen,” “Bedroom 2,” “Office”) and add a two‑word content note (“Bakeware & Lids,” “Winter Coats”). Duplicate the room label on a side panel so it’s visible when cartons are stacked. A basic color key—one tape color per room—can further speed doorstep sorting and room placement.
When an item should be accessible immediately, add OPEN FIRST to the top. Labels that are short, legible, and consistent let crews land cartons in the correct room on the first pass and help households start living normally sooner—without late‑night rummaging through a mountain of unlabeled boxes.
Tip 5: One Room per Box—Finish a Room Before Starting Another
Mixing categories across rooms often feels efficient in the moment and chaotic at destination. The “one room per box” rule concentrates attention and reduces unnecessary walking. It also aligns with how teams load and unload—by room—so bedrooms can be made functional first while hobby gear and seasonal items wait their turn.
A printed checklist or small whiteboard adds momentum: “Hall Closet—DONE,” “Guest Bath—DONE,” “Pantry—DONE.” Crossing off complete rooms lowers decision fatigue, makes wrapping more careful, and prevents the scatter that leads to misplacement and breakage. By the time a room is empty, it’s easy to vacuum, turn off lights, and close the door—another small victory that protects energy for the rest of the house.
Tip 6: Build an “Open‑First” Essentials Bin
Even well‑timed moves can run long. A dedicated clear plastic tote ensures the household can function upon arrival. The most reliable kit includes travel‑size toiletries, a change of clothes per person, two fresh towels, bed linens and pillows, a compact pan and utensil set, shelf‑stable snacks, chargers, a small power strip, night‑lights, basic tools, and a labeled envelope with Wi‑Fi credentials and utility account numbers. Pet supplies and prescriptions belong in the same tote.
Keep this bin in a personal vehicle so it never disappears into the general stack. Mark the lid with bright tape and the words OPEN FIRST. With an essentials bin, the first evening includes hot showers, a simple meal, and charged phones—no matter how many boxes remain unopened.
Tip 7: Disassemble Large Furniture Early
Large household pieces navigate better when broken down in advance. Beds, dining tables, and modular sectionals should be disassembled before move day to prevent tight‑turn improvisation that scuffs paint or trim. Photograph each item from several angles, place fasteners into labeled zipper bags, and either tape those bags to the corresponding frame or collect them in a clearly marked “Hardware—Open First” carton. Wrap sofa feet, shelves, and table leaves in towels and nest them beside cushions or mattresses for scratch protection.
Precision items—especially pianos—are best left intact for trained handling. Professional teams plan routes, use appropriate supports, and move such pieces steadily to minimize risk to both instrument and interior finishes. Early disassembly of standard furniture keeps hallways clear for safe carries and shortens loading times without the risks that come from ad‑hoc instrument teardown.
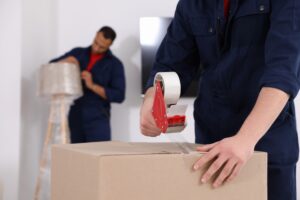
Tip 8: Use Quality Shipping Tape
Tape quality determines whether a seam survives humidity, vertical stacking, and long carry distances. Acrylic shipping tape adheres reliably; masking tape dries and peels, and duct tape can shear under torsion. Reinforce the bottom seam with one long strip plus two crosswise strips, press edges to remove air pockets, and apply two clean strips across the top when sealing. A handheld dispenser speeds application and leaves neat edges that resist snagging during carries.
Sturdy seams are inexpensive insurance. A failed seal spills contents, slows the day, and risks scuffing floors while a carton is repacked. A few extra feet of proper tape can prevent hours of lost momentum.
Tip 9: Maintain a Central Inventory—Box Numbers, Rooms, and Quick Notes
A lightweight, cloud‑based inventory keeps the household aligned. Assign each carton a number, record its room, and add a brief contents line (“Pans & Baking Sheets,” “Office Cables & Router”). Snap a quick photo of high‑value items and link it in the file. During unloading, rows can be shaded green as boxes arrive in good condition, with a separate column for questions or notes.
This single sheet becomes the unpacking roadmap: sort by room, open in priority order, and avoid unnecessary reshuffling. For families juggling school, work, and contractors, a visible inventory also reduces repeated “Where is it?” conversations and keeps energy focused on setting up the most important spaces first.
Tip 10: Leave Specialty Items to Trained Crews
Gym treadmills require specific reassembly; pool tables demand precision care to protect the slates; safes weigh as much as compact cars; hot tubs need special care to protect the pump and substructure. Booking Utah professional crews protects warranties, floors, and your spine. In Utah, homeowners often coordinate these categories with reputable movers from Red Barn Movers as part of a sensible, streamlined plan—channeling every fee into life‑skills programs in Salt Lake, Phoenix, and Seattle.
Specialty handling is more about method than muscle: correct lifting points, appropriate supports, and deliberate routing through finished spaces. Recognizing where professional help belongs prevents the most expensive errors and preserves the integrity of both the home and the items themselves.
Pack With Purpose, Travel With Confidence
When every carton is sealed and the truck door rolls down, you deserve the calm that comes from knowing trained crews are handling your antiques, gym racks, and spa as carefully as you packed them, so Red Barn Movers invites you to experience a relocation that benefits your family—contact us today and let our expert moving service turn your next move into a force for good.